three people looking at documents

Listing Agent: The Key to Finding the Right Person

Home is where the heart is, and if you’re ready to sell your current home, you want to make sure you’re putting your trust in the right hands. Your listing agent will work with you to price and market your home, negotiate with buyers and help with closing the deal.

Here’s how to find an expert that works with you and your needs.

Know Your Timeframe

Have a listing date in mind? Backtrack six to eight weeks before that time, and aim to hire a listing agent around that time.

This will give you both the time to prepare to go live with your listing. For you, that might mean making repairs or upgrades. For your agent, that means working on creating a polished listing, ideas for marketing the house, pricing and more.

Begin Your Search

As you approach that ideal time to hire a listing agent, start researching professionals.

You can search for a Chicago REALTOR® here, or ask friends and family for recommendations. Remember, it doesn’t hurt to shop around. You’ll be working side by side with your agent, so make sure you find someone your trust to do the job.

Conduct Interviews

Take the recommendations and research you’ve done to set up interviews with agents. Here are some suggested questions that will help you determine if an agent is the right fit for you:

  • How long have you been in the real estate business?
  • What’s the price range of the homes you typically sell?
  • What is your fee?
  • How do you market homes?
  • How long are your homes usually on the market?
  • What’s your communication style?

During these interviews, make sure the agents understand your goals and meet the expertise qualifications or personality you’re looking for. If you follow those two desires, you’ll be sure to find a listing agent that works for you!

Roadmap to Selling Your Home

Your home holds all of your family’s memories, but maybe it doesn’t fit your needs any longer. When you’re ready to take the step and sell your home, make sure to set yourself up for success. We’ve put together a roadmap of milestones to help you plan out the selling process from start to finish.

  1. Do your research. Once you’ve decided to sell your home, start your research. The housing market has likely changed since you last purchased a home, so find out about mortgage rates, inventory and other aspects of the market that will impact the selling process.
  2. Choose a REALTOR®. Your most important relationship you’ll have as you sell your home is with your REALTOR®. Take the time to search for one, and interview them, to decide who you want with you on this journey. Use our database to start your search for a Chicago REALTOR®.
  3. Price your home. Don’t worry, you don’t have to do this alone! Work with your REALTOR® to look at the current market and comparable homes to set the right price to get your house sold.
  4. Prepare for the sale. Set up a time for professional pictures, schedule showings and plan open houses will take place. Make sure your home is picture perfect to make a great impression on potential buyers. Clean up, declutter and make repairs to get your home in tip top shape.
  5. Start marketing. Work with your REALTOR® to put together a top tier online listing with perfect pictures and a strong description. Then, create a plan to share the listing to get as many eyes as possible.
  6. Show your home. Your marketing worked, and now potential buyers want to check the home out! Work with your REALTOR® on a schedule for showing, and make sure to incorporate a plan to keep everyone safe, like disinfecting surfaces and hosting virtual tours, if need be.
  7. Look at your offers. Yes, it’s possible to receive more than one offer! Sit down with your REALTOR®, review each one and determine which is best for you.
  8. Time to negotiate. Enter a counteroffer to the buyer’s offer based off of what you want. Of course, money is a factor, but timing may also be another big negotiation. Your REALTOR® will help craft your counteroffer based off all these factors.
  9. Get the home inspected. Once you have agreed on an offer, the buyer will set up a home inspection. Your home will be examined for any issues, and repairs can be negotiated by the buyer. Work with your REALTOR® to come to an agreement with the buyer.
  10. Close the deal. Now, it’s time to make things official. During the closing, you will sign the final paperwork and collect your check!

home inspection discussion

Your Home Inspection Questions, Answered!

Congratulations! You’ve made it to your home inspection, which means you’re within reach of closing on your home. Unsure of what to expect? We (and your REALTOR®) here to help.

Why should you have a home inspection done?

Purchasing a home is a big commitment, and a home inspection is your way of knowing you’re making the right fiscal choice. An inspection will spot any current or potential problems within a home, providing safety and peace of mind in the purchasing decision. During the process, your inspector will identify problem areas, suggest solutions and write a report with all of the findings.

Also, many mortgage lenders require an inspection to be performed before financing a home, so it’s best to cover all of your bases by having an inspection completed.

How do I find an inspector?

It is the homebuyer’s responsibility to find an inspector to perform the home inspection. Typically, your REALTOR® will be able to recommend a professional. If you’re interested in looking for one on your own, you can search for a local inspector using the American Society of Home Inspectors’ (ASHI) Find a Home Inspector tool.

When talking with an inspector, here are some things you should look for:

  • They should have a home inspector license.
  • Ideally, hire someone who has at least five years of experience.
  • Make sure they can turn your report around within your required timeframe, as an inspection typically needs to take place within five to seven days of your offer being accepted.

What will, and won’t, an inspection cover?

As a rule of thumb, most inspectors will check a home’s:

  • Exterior, including walls, foundation, grading, roof and garage
  • Interior, including plumbing, electrical, heating, air conditioning, appliances and all rooms

And they will not check:

  • Swimming pools
  • Wells
  • Chimneys
  • Inside pipes or sewer lines
  • Inside walls

What happens on the day of the home inspection?

Both you and your REALTOR® should be in attendance on the day of your inspection. Depending on the size of the home, most inspections take between two and three hours to complete.

Yes, you can ask questions! The inspector will give you firsthand explanations of their findings, point out problem areas and answer any questions that may arise. Everything that is discussed in person will then be written up in their report.

What happens after an inspection?

Once the inspection is complete and you’ve received the report, discuss the findings with your REALTOR®.

Legally, the seller must fix structural issues, building code violations and safety issues. Beyond that, you are able to negotiate with the seller what other issues you would like fixed before purchasing the house. Your REALTOR® will submit a request for repairs that the seller will either agree to or counteroffer.

If the problems that arise from the inspection are too significant or expensive, you always have the right to step away from the purchase if your purchase contract has an inspection contingency. Usually, you have about seven days to make that decision.

While a home inspection may cost money upfront, it will also help you save money, and move forward with a greater peace of mind in the long run.

Make Your Open House A Success

So you’re selling your house, and now it’s time to show it off to buyers! Use these tips, and the help of your REALTOR®, to make a great first impression during your open house.

Make Your Home Open House Ready

Make sure your home is picture-perfect by the time your open house comes around. Here are some things we recommend you take the time to do:

  • Clean Up Clutter: Tuck away additional clutter within your home, including clothes, cleaning supplies, toys and more. If you don’t have a good location to put it all, consider renting a storage unit.
  • Make Your House Spotless: Deep clean every inch of your home, so your windows are spotless and there are no dust bunnies in sight. Don’t have the time? Hire a cleaning service. Your REALTOR® likely has some recommendations for you.
  • Consider Cosmetic Repairs: This isn’t the time to make any big changes, but if you spot chipped paint or burnt out lightbulbs, making those repairs will go a long way in making your house look great!
  • Remove Any Personal Items: When a potential buyer walks into a home, they want to be able to picture themselves in it. Seeing photos of your family and other personal items can hinder that experience, so put them away for the time being. Also, put any valuables in a secure location, just in case.

Get The Word Out

Although your REALTOR® will do a lot of heavy lifting on this front, it doesn’t hurt to give them a hand. Add posts to your social media platforms, such as neighborhood groups, if you’re part of them, to get the word out. Or, if you frequent a local coffee shop or popular store with a bulletin board, don’t be afraid to go “old school” with a flyer.

Also, work with your REALTOR® on a few different aspects of the open house, such as:

  • Setting up yard signs to announce the open house. If you live in a winding neighborhood or subdivision, put signs around the neighborhood to direct visitors to the right location.
  • Add the open house information to your online listing for additional traffic.
  • Decide on the best time to host the event. Sundays are typically the most popular, and other open houses may take place between 1:00 PM to 3:00 PM. Consider starting earlier, around noon, or keep yours open later, until 4:00 PM or 5:00 PM, so you’re not competing for visitors.

Let Your REALTOR® Take the Reins

When the day comes, step back and let your REALTOR® work their magic. Make sure to leave your house (having the seller lurking around isn’t the best look), but keep your phone on you in case your REALTOR® has questions.

Afterward, debrief with them about any questions that came up or comments that were made, and discuss how to address them to get your home sold!

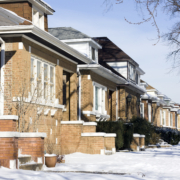
Row of homes in snow

The Ultimate Winter Maintenance To-Do List

As cold weather creeps in, it’s time to start looking at your winter maintenance to-do list. Use this list to start checking off your tasks to prepare for everything that comes with the wintry season.

Check for Drafts

Before Chicago temperatures drop consistently into the single and negative digits, save on your energy costs by addressing drafty entry points. You can save up to 20% each year, according to the U.S. Energy Department. Look for cracks in window caulking or doorway weatherstripping, which are two common causes of drafts.

Inspect Your Roof

Before the first snowfall, check for leaks in your roof! If you don’t know what to look for, a professional roof inspection can determine if there are any issues.

If you want to look for yourself, check for cracks or rust on flashing, warped shingles or build up of moss or lichen (which could mean decay below).

Clean Your Gutters

Clear debris from your gutters to avoid clogs which can lead to dangerous and damaging ice dams. Clogged gutters can cause expensive water damage! Follow these tips to clean your gutters.

Trim Tree Branches

Heavy snow can weigh down branches and even cause them to break off, and you don’t want them hitting and damaging your house! Make sure any limbs or branches around the outside of your home are at least three feet away.

Prep Your Pipes

Water expands when frozen, and if that water is in your pipes, it can cause them to burst. Avoid this by insulating pipes that run through unheated spaces like garages, crawl spaces, et cetera.

If the weather is expected to be particularly cold, consider setting your faucets to drip, which ensures water continues to move through the pipes and doesn’t grow stationary enough to freeze.

Check Smoke and Carbon Monoxide Detectors

Get in the habit of checking your smoke and carbon monoxide detectors once a season to see if their batteries need to be replaced. These are important safety guards!

In the end, winter maintenance doesn’t have to be intimidating! With planning and foresight, your home will be ready for whatever winter brings.

couple working on a home renovation

The Home Renovations That Will Bring You Joy – & ROI

Whether you’re doing a home renovation for your own pleasure, to update your space or to fix something that’s broken, home projects are always in demand. We’re breaking down the projects that bring the most joy to homeowners, and the ones that will make you the most money when you’re ready to sell.

Home Projects That Bring the Most Joy

Certain projects make you want to stay at home more, increase the enjoyment of your home or simply make a homeowner happy. According to the National Association of REALTORS® (NAR) and the National Association of the Remodeling Industry(NARI), these are the projects that bring the most joy for homeowners:

  • Painting your home’s interior, either just a room or the entire home
  • Adding a home office
  • Refinishing hardwood floors
  • Closet renovations
  • Insulation upgrades

Renovations With the Highest Cost Recovery

When it comes to choosing a project for your home, there are some renovations that will have a bigger pay off in the long run compared to others. Here are the home renovations NAR and NARI say you will recover the cost of the project when selling your home.

  • Refinishing Hardwood Floors
    On average, this project costs about $3,400, and $5,000 is the estimated cost recovery, making it a 147% cost recovery.
  • New Wood Flooring
    Typically, new wood floors cost $5,500, and $6,500 can be recovered, a 118% cost recovery.
  • Insulation Upgrade
    On average, this project costs about $2,500, and $2,500 is the estimated cost recovery, making it a 100% cost recovery.
  • New Roofing
    Typically, new roofing cost $12,000, and $12,000 can be recovered, a 100% cost recovery.
  • New Garage Door
    Typically, a new garage door cost $2,000, and $2,000 can be recovered, a 100% cost recovery.

The Ultimate Spring Maintenance Checklist

Goodbye freezing cold, hello spring! It’s time to start looking at your spring maintenance to-do list. Use this as a resource to start checking off tasks and getting ready for warmer albeit rainier weather.

Scan For Termites

Starting in March, termites become more prevalent. Keep an eye on any exterior wood of your home (porches and patios are common culprits). If you notice a hole with a winged insect the size of a rice grain flying out, that’s likely a termite. Call a pest control company as soon as possible!

Keep Mosquitos at Bay

Mosquitos can be pesky nuisances, but there is one straightforward trick to keep the hordes away from your home: get rid of any standing water. Mosquitos lay their eggs on stationary water! With no place to lay eggs, you’ll see less flying around your santuary.

Clean Your Screens & Windows

Temperatures aren’t too hot or too cold come springtime, so it’s a popular time of year to enjoy open windows. How are those windows looking? Clean filth off the screens and wipe the grime off the glass so you can enjoy as much sunshine as possible.

Clear Your Gutters

Now that the weather has thawed, rainstorms are on their way. Part of your spring maintenance checklist should include clearing leftover leaves and debris so there are no drainage issues when spring deluges truly open up.

Get Your Air Conditioner Serviced

Take care of your air conditioning units with regular service checks by scheduling a visit before the summer temperatures truly crank up. Plus, you’ll save money and stretch out the lifespan of the unit.

Check Smoke & Carbon Monoxide Detectors

Last, but certainly not least, get in the habit of checking your smoke and carbon monoxide detectors once a season to see if their batteries need to be replaced.

Cold Weather Tips for Safety and Prevention

During the winter season, it’s important to be proactive in protecting your family and your home from the elements. Below are our tips to combat the cold weather and prevent larger issues in the future.

  • Increase your thermostat’s temperature 2 to 3 degrees on extra cold days
  • Leave cabinet doors open if pipes are inside
  • Ensure all windows are fully closed and locked
  • Use door sweeps to stop drafts
  • Run faucets at a slow drip if temperatures drop below 0 degrees

Also, space heaters are typically used more frequently in cold weather. remember that space heaters can be dangerous. The following types will help avoid the risk of fires or other potential harm:

  • Keep blankets and other fabrics at a distance
  • Invest in newer models, which tend to be safer
  • Avoid connecting them to extension cords, as they increase the risk of fires
  • Ensure fire detectors are working

Following these tips will help protect your building and tenants during Chicago winters.